Using BlueSheet
Introduction Video
Gaining Access
Anyone with a University of Minnesota Internet ID has access to BlueSheet. By logging in, you'll see which groups you're currently a member of.
Group Management Access
In order to create groups or browse existing groups, you need to be granted elevated privileges. As we're currently in development on this tool, those permissions are site-wide. We may move to a more granular structure in the future, based on feedback from our users. For now, to request the ability to create and manage groups, just send us an email.
Creating a Group
If you've got the appropriate permissions, you can create a group by clicking "create a group" in the navigation bar. You'll be asked to enter a name, select a folder, and a group type. If you'd like additional folders added, please send us an email.
Group Settings
After creating a group, you can click "Edit Group" to adjust some additional settings. You can change the group name, organization or type.
Abbreviation
We love acronyms and abbreviations. You can add the abbreviation for a group in this field.
Folder
Folders are ways to organize groups, to aid with browsing and exploration.
Parent Group
The "parent group" is a way to specify that this group is a sub-group or sub-committee. For example, if you've got working groups that split off from a primary group to accomplish a task, you might use this feature to keep track of them.
Show Unit Checkbox
The "Show Unit" checkbox will include members' organizational unit in the list of members. If all of your members are from one organization, you can turn this off to remove some clutter.
Google Group Name
If this group has a Google Group, you can add that info here.
Group Notes
Add additional descriptive information about the group.
Artifacts
Artifacts provide you a way to add arbitrary links to your group. For example, you can link to the group's website, team drive, charter document, or shared calendar. Each artifact gets a title and a link. You must click save after adding artifacts
Adding Members
After adding a group, you can add members. Click on "edit group" and then click "add member". You can either enter a name to look someone up, or enter their internetId (x500) or email address. You can bulk-add people using a comma-separated list of email addresses or internetIds. Even if these lists include other information (names, etc), BlueSheet will automatically find the email addresses with in a list.
You can also assign a role when adding a member. The dropdown shows commonly used roles, but you can type to add your own. Every member must be assigned a role.
After adding members, you must click the "save" button.
Roles
BlueSheet automatically suggests commonly used roles, but you can type anything you want into the role field.
Member options
If you're adding a "department", BlueSheet will show a list of "official roles" for departments. These are just reminders for you, and aren't required.
You can set both start and end dates. End dates can be in the future as well - BlueSheet will automatically remove users when the date passes.
BlueSheet Managers
Anyone with a checkmark in the "BlueSheet Managers" column will have permission to edit this group in BlueSheet, and will be able to create and edit subgroups underneath this group. Anyone within your group can be given this permission - it's totally separate from the "role" you've selected.
Editing Membership
Membership can be edited at any time. To remove a member from a group, click the red icon of the person with the minus sign. This will remove their current membership, but you'll always be able to see historical membership data with the "include previous members" checkbox. You can also edit the member's participation dates - for example, if you'd like to add historical data, you can backdate membership.
The notes field can be used to capture any extra data - for example, a reminder of which cohort someone is a member of.
After editing members, you must click the "save" button.
Deactivating a group
When a group is deactivated, all of the current members are marked as inactive. The group is not deleted though, so it will still be available for historical purposes, and membership can still be accessed. This is a good way to retire a group that is no longer functioning.
Favorites
Browsing Groups
The "Browse Groups" link in the header allows you to navigate through existing groups, or filter by folder hierarchy.
Browsing Roles
The "Browse Roles" link allows you to see all of the people who have been tagged with a given role. You can use this to generate email lists or spreadsheets for all of the people in a given role.
Adding folders
Folders provide a way to "group groups", based on College or other high-level organization. Folders don't have their own memberships, they just hold other groups. To request that a new folder be added, please send us an email.
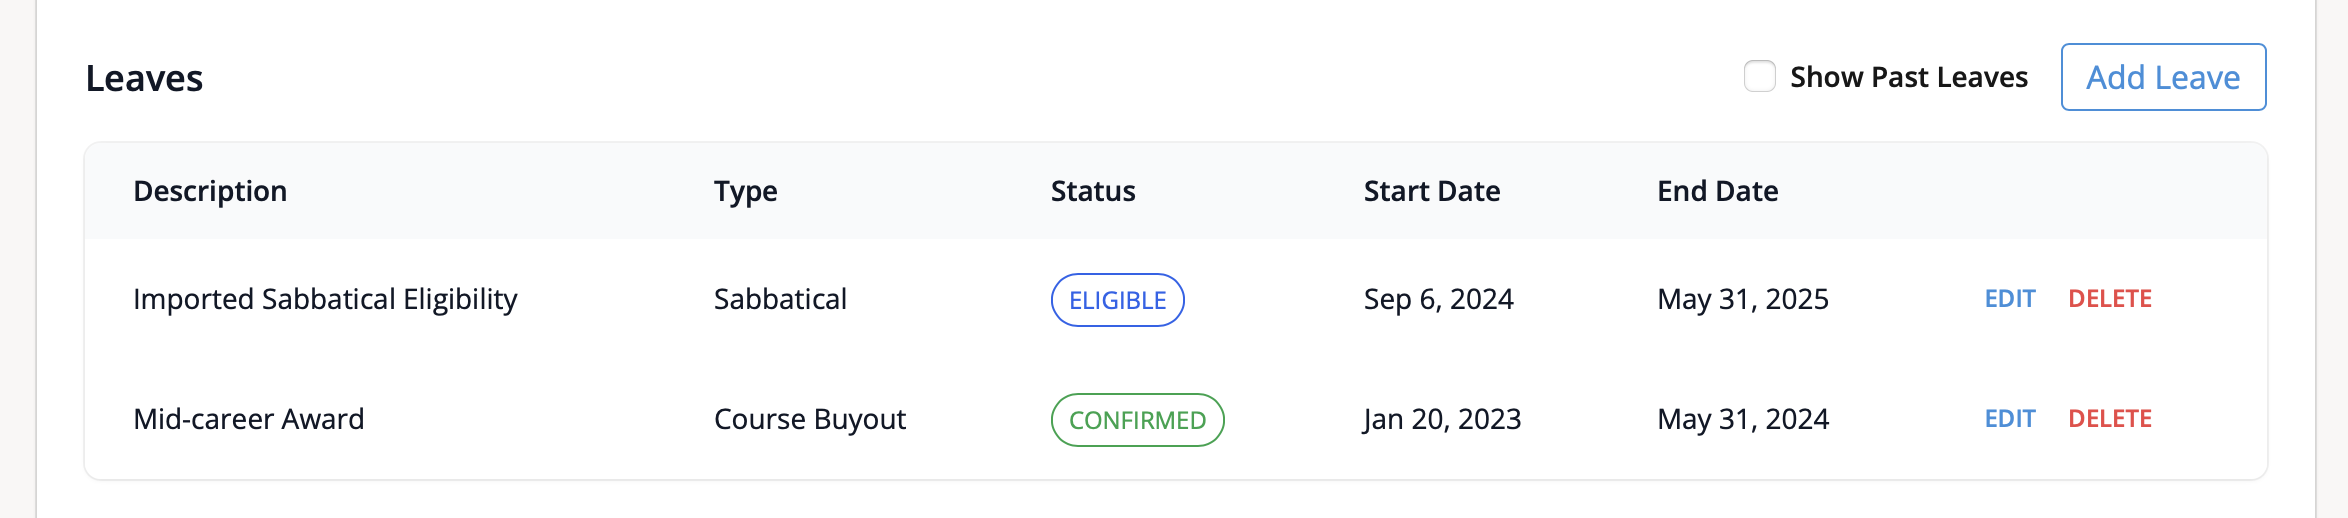
Leaves
BlueSheet tracks faculty leaves and leave eligibility. These features are intended to give departmental staff an easy way to keep track of leaves for scheduling purposes, and to provide shared visibility for faculty and departmental staff. The leave features in BlueSheet do not automatically enter leaves into Peoplesoft. Normal HR processes should be followed to officially enter leaves.
Automatically Imported Leaves
BlueSheet automatically imports historical leave data, including sabbatical information. These leaves will be have the description of "Imported Leave". These leaves can be edited to add additional historical context if desired.
BlueSheet also automatically imports information about eligibility for sabbatical, single semester leave, and mid-career awards. Eligibility data is only updated once per academic year, usually in September.
Adding and Editing Leaves
Users with BlueSheet Manager permissions can add and edit additional leaves within a group member's user record. Begin by finding a user by clicking User Lookup in the navigation bar. The "Leaves" section is at the bottom of their profile page.
Any current or future leaves will be displayed by default. The "Show past leaves" checkbox enables you to view historical leave data.
To add a leave, click "Add Leave". There are six leave types - Sabbatical, Development, Single Semester, Course Release, Course Buyout, and Other. Leaves can be entered with one of four statuses, Confirmed, Pending, Eligible, and Cancelled.
The description field allows you to add additional context for the leave - for example, keeping track of why a course release was granted. Do not enter medical information in the description field. FMLA-type leaves should be entered as "Other" with minimal description.
Faculty Leaves Planning Report
BlueSheet Managers can use the Faculty Leaves Planning Report to quickly get a sense of how leaves and other scheduling issues might impact course planning. The Faculty Leaves Planning Report link is attached to any academic department in BlueSheet. If you don't see the report and believe you should have access, contact support.
The Faculty Leaves Planning Report displays a grid of semesters and instructors, with entries for courses taught and leave data. Courses in the future are generally only available for one or two semesters.