Work
Now that you’re setup, it’s time to get to work on actually making content and testing it.
Before you begin working
Before you begin any work, it’s always a good idea to make sure that your fork of the repository is as up-to-date as possible. (Since others might have added new content after you made your fork).
Step 1. Go to your own fork
Pay attention to the banner above the list of files.
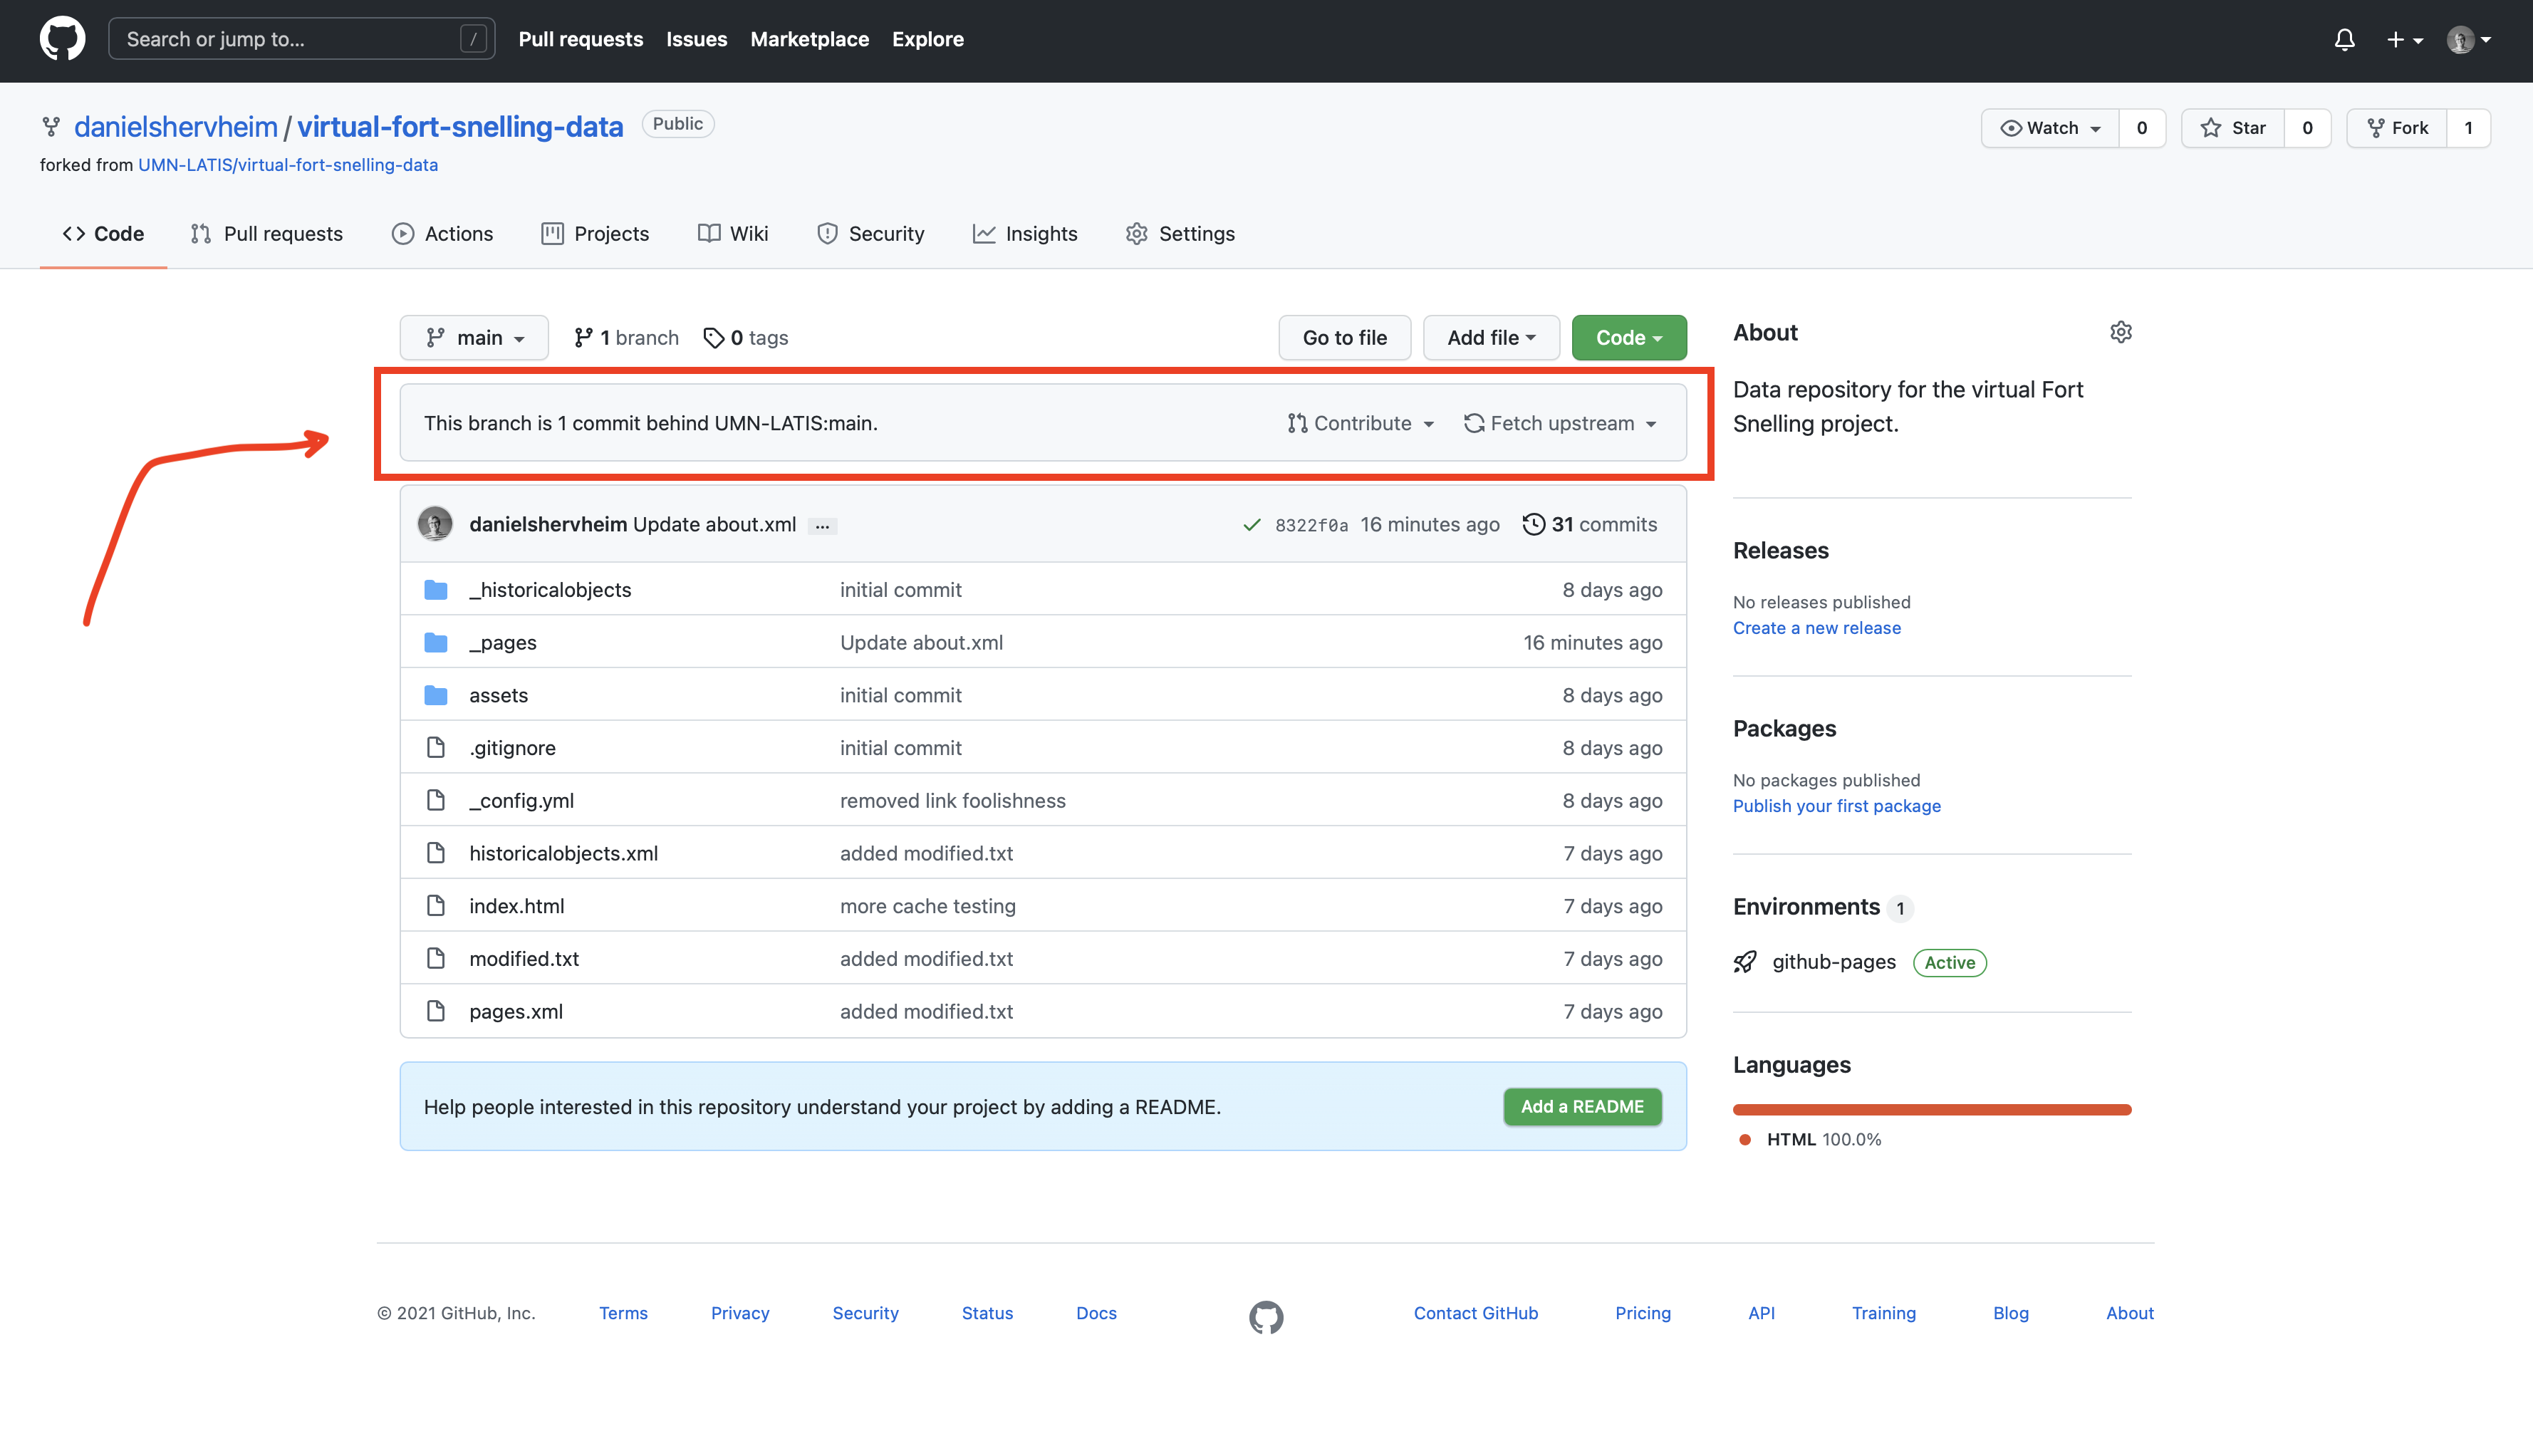
If it says “This branch is even with UMN-LATIS:main”, then you can proceed to the next section. Otherwise, read on.
Step 2. Press the “Fetch Upstream” button
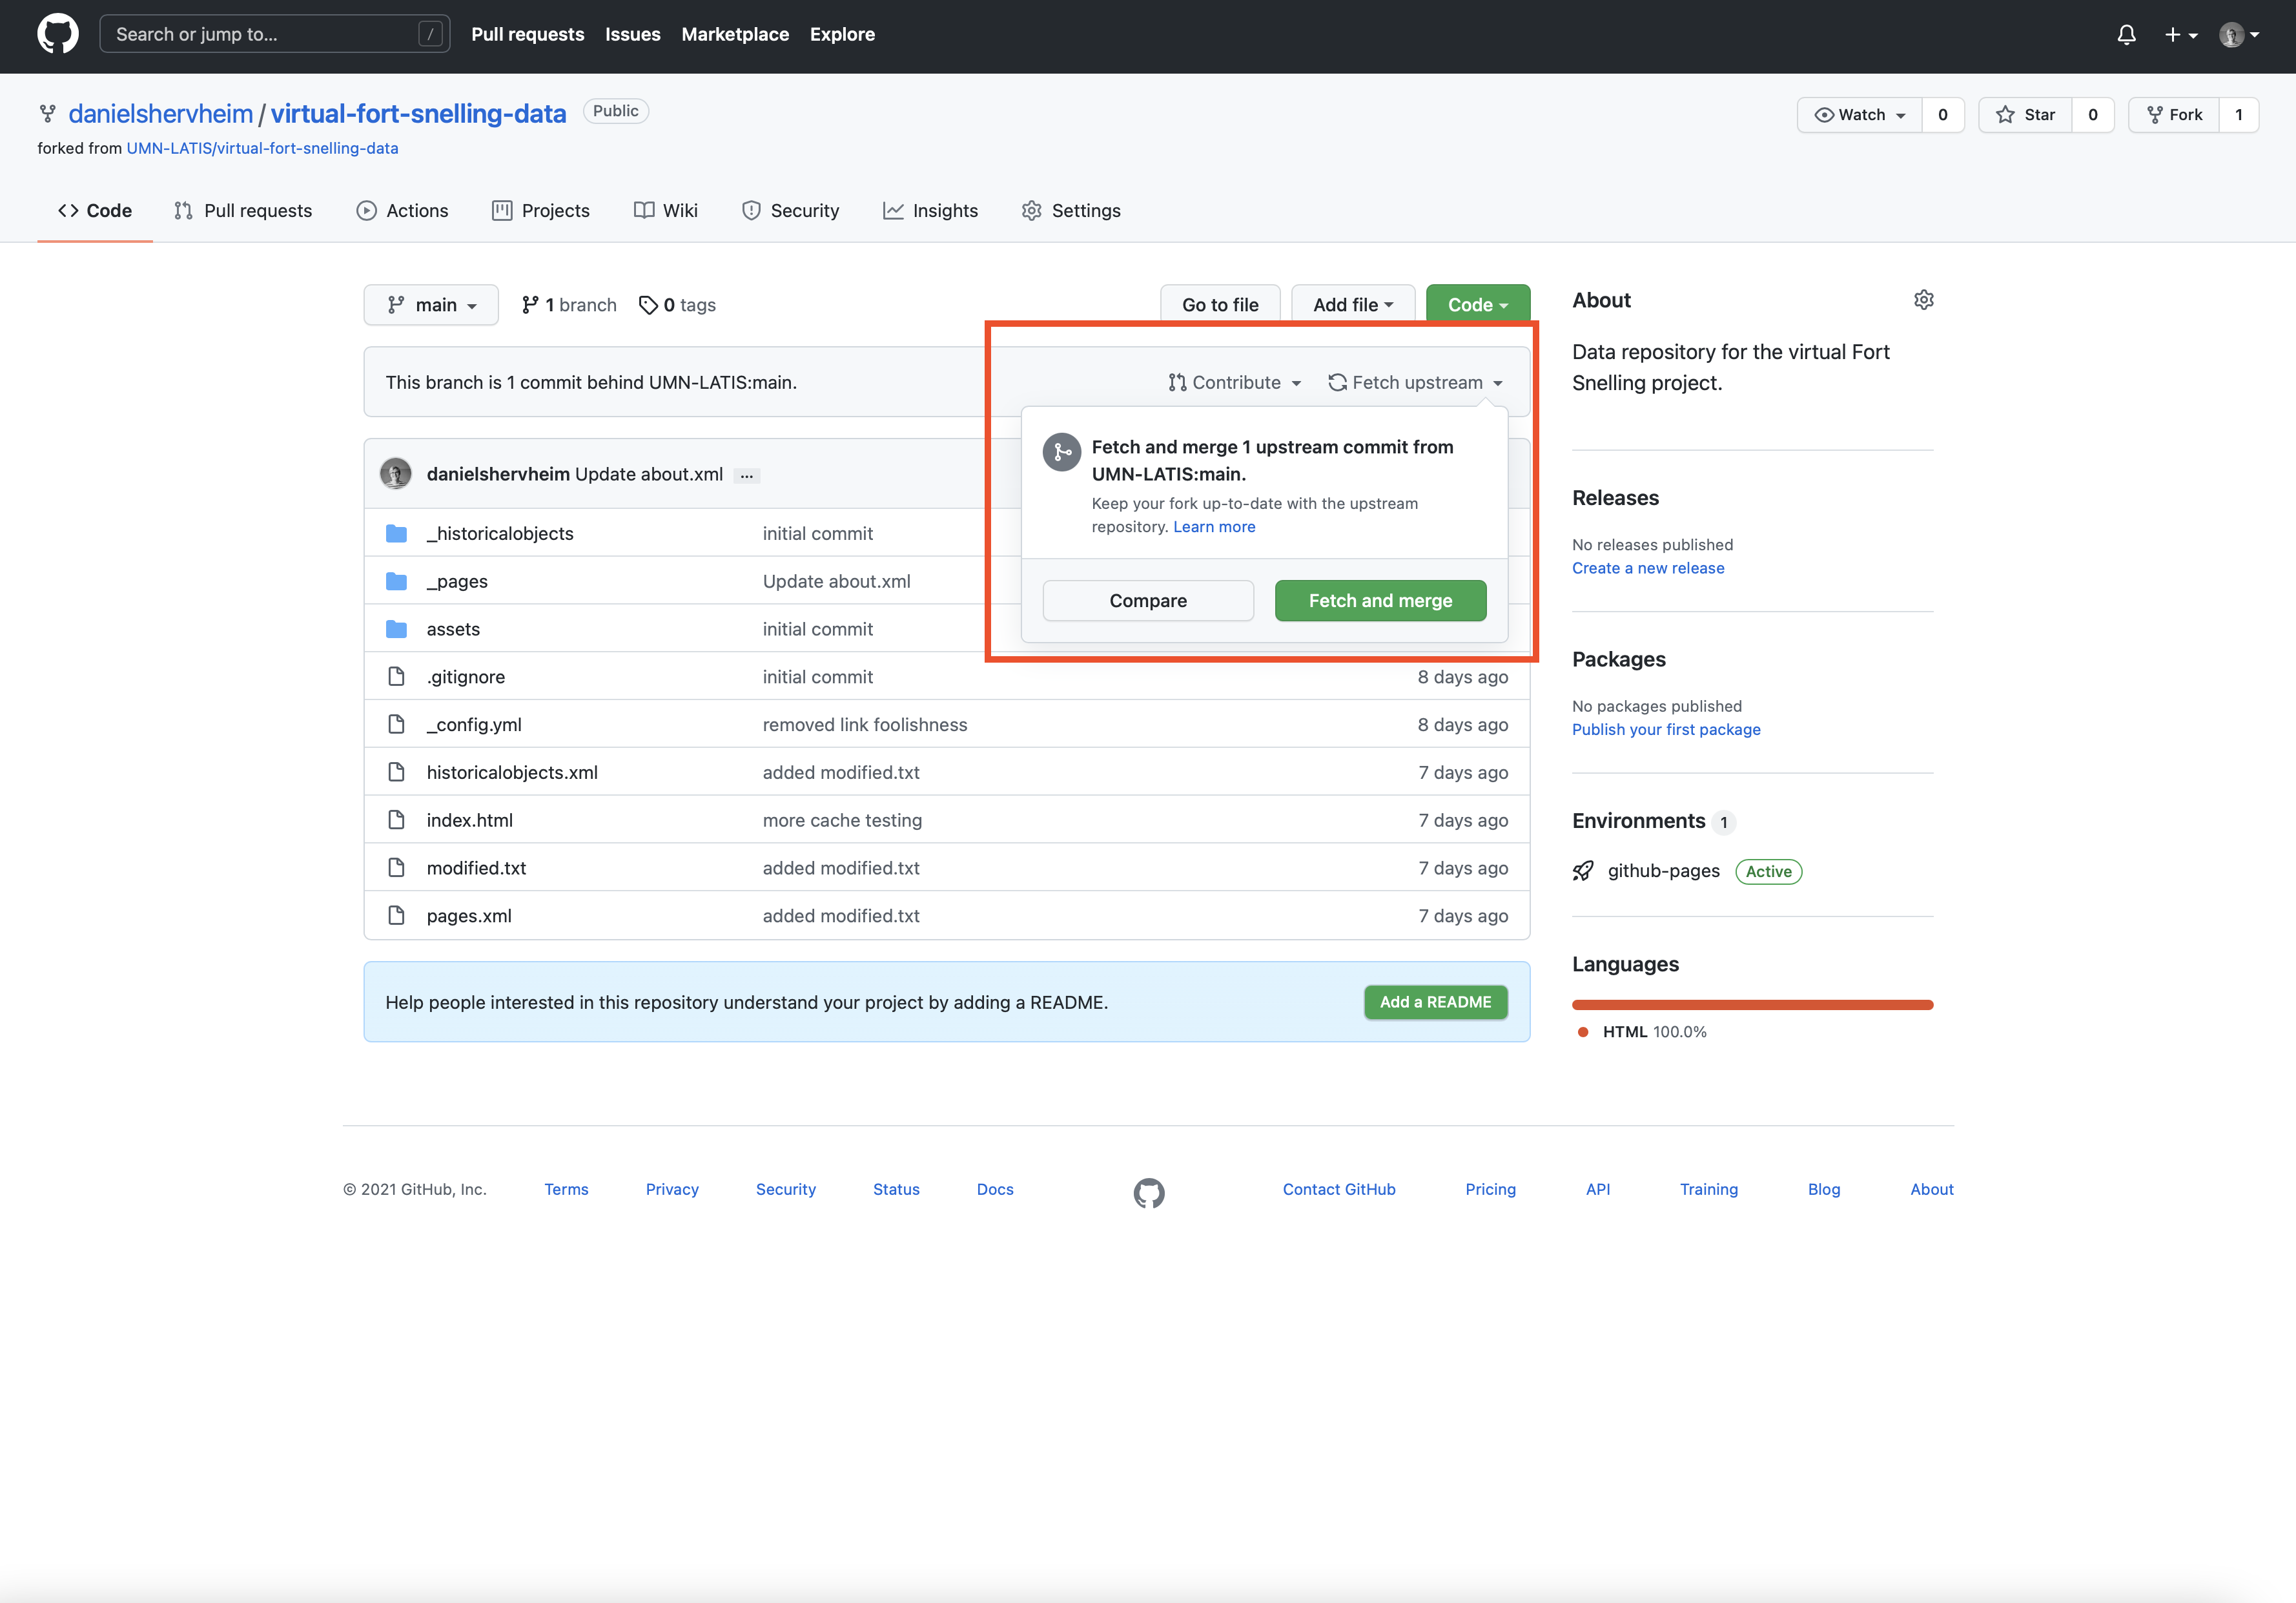
Step 3. Press the “Fetch and Merge” button
If all goes well, your fork of the repository should automatically update itself based on the latest copy of the original.
If something goes wrong, you will need to dig a bit deeper into Git to determine where and how. Feel free to contact us for help related to this.
1. Modify the content
At this point, you can add and/or modify content as you see fit!
Please see the Adding New Pages guide for a detailed tutorial on how to add new content to the app.
For now, we will just make a small change.
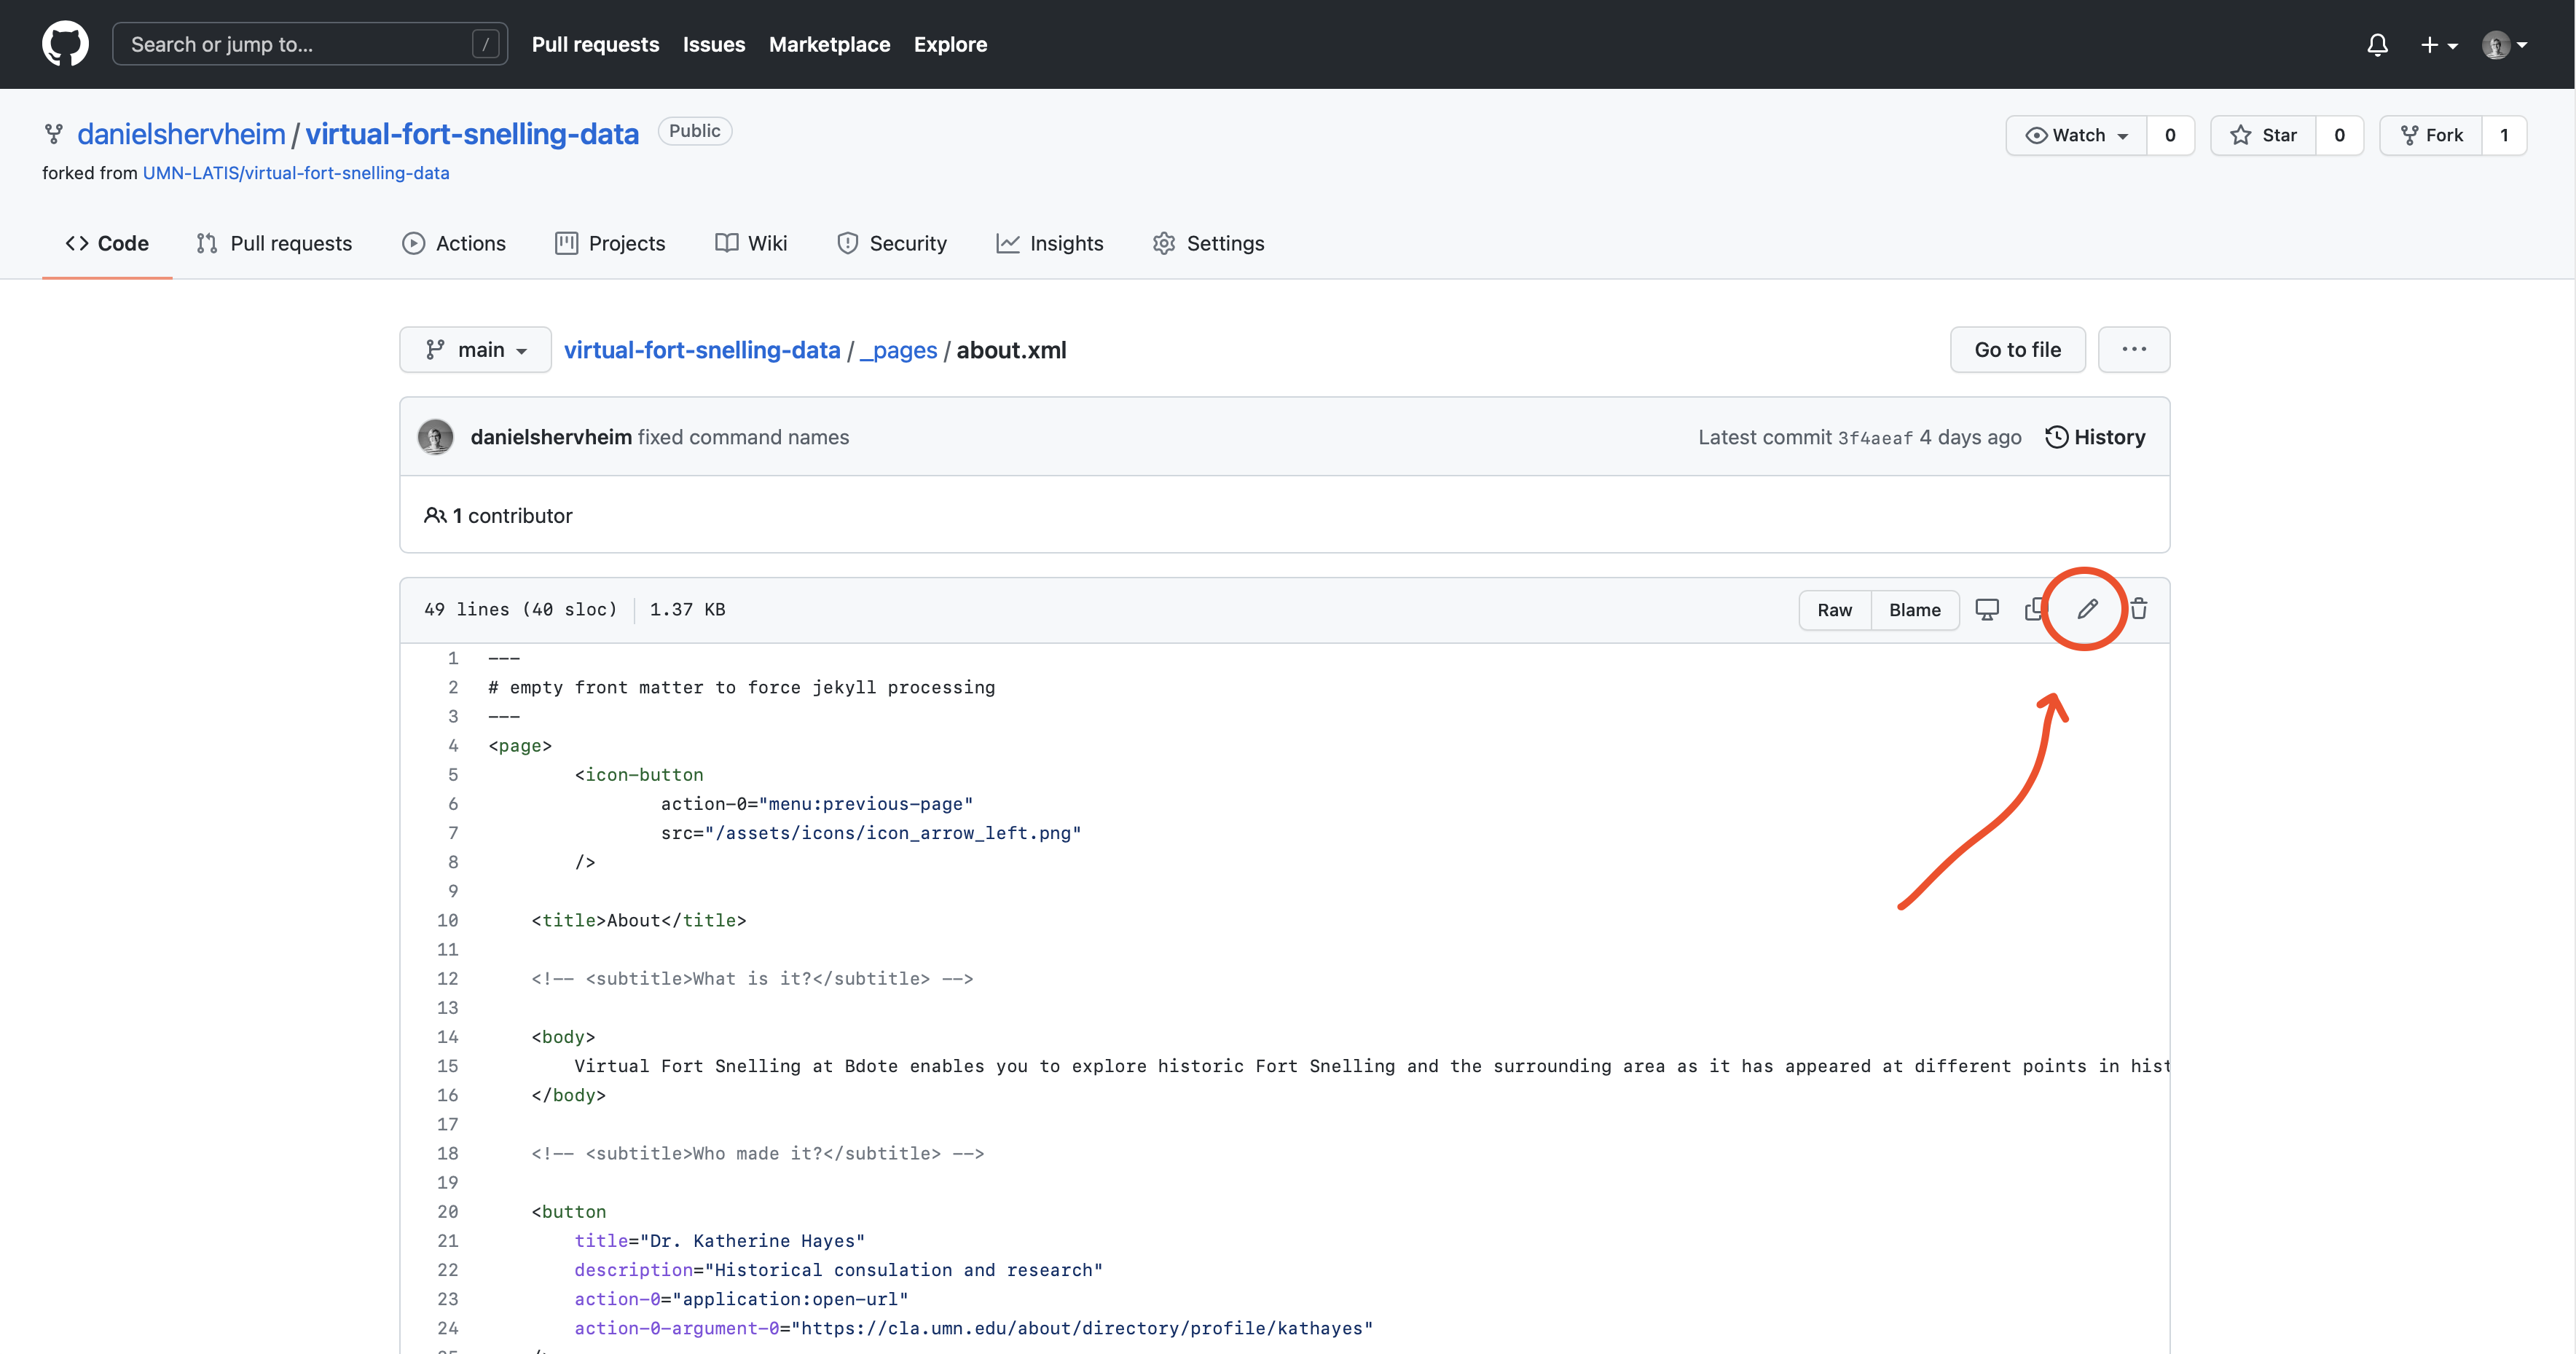
Step 1. Find a file to modify
I’ve chosen the about.xml file. Go ahead and click the “Edit” button.
Step 2. Make your changes
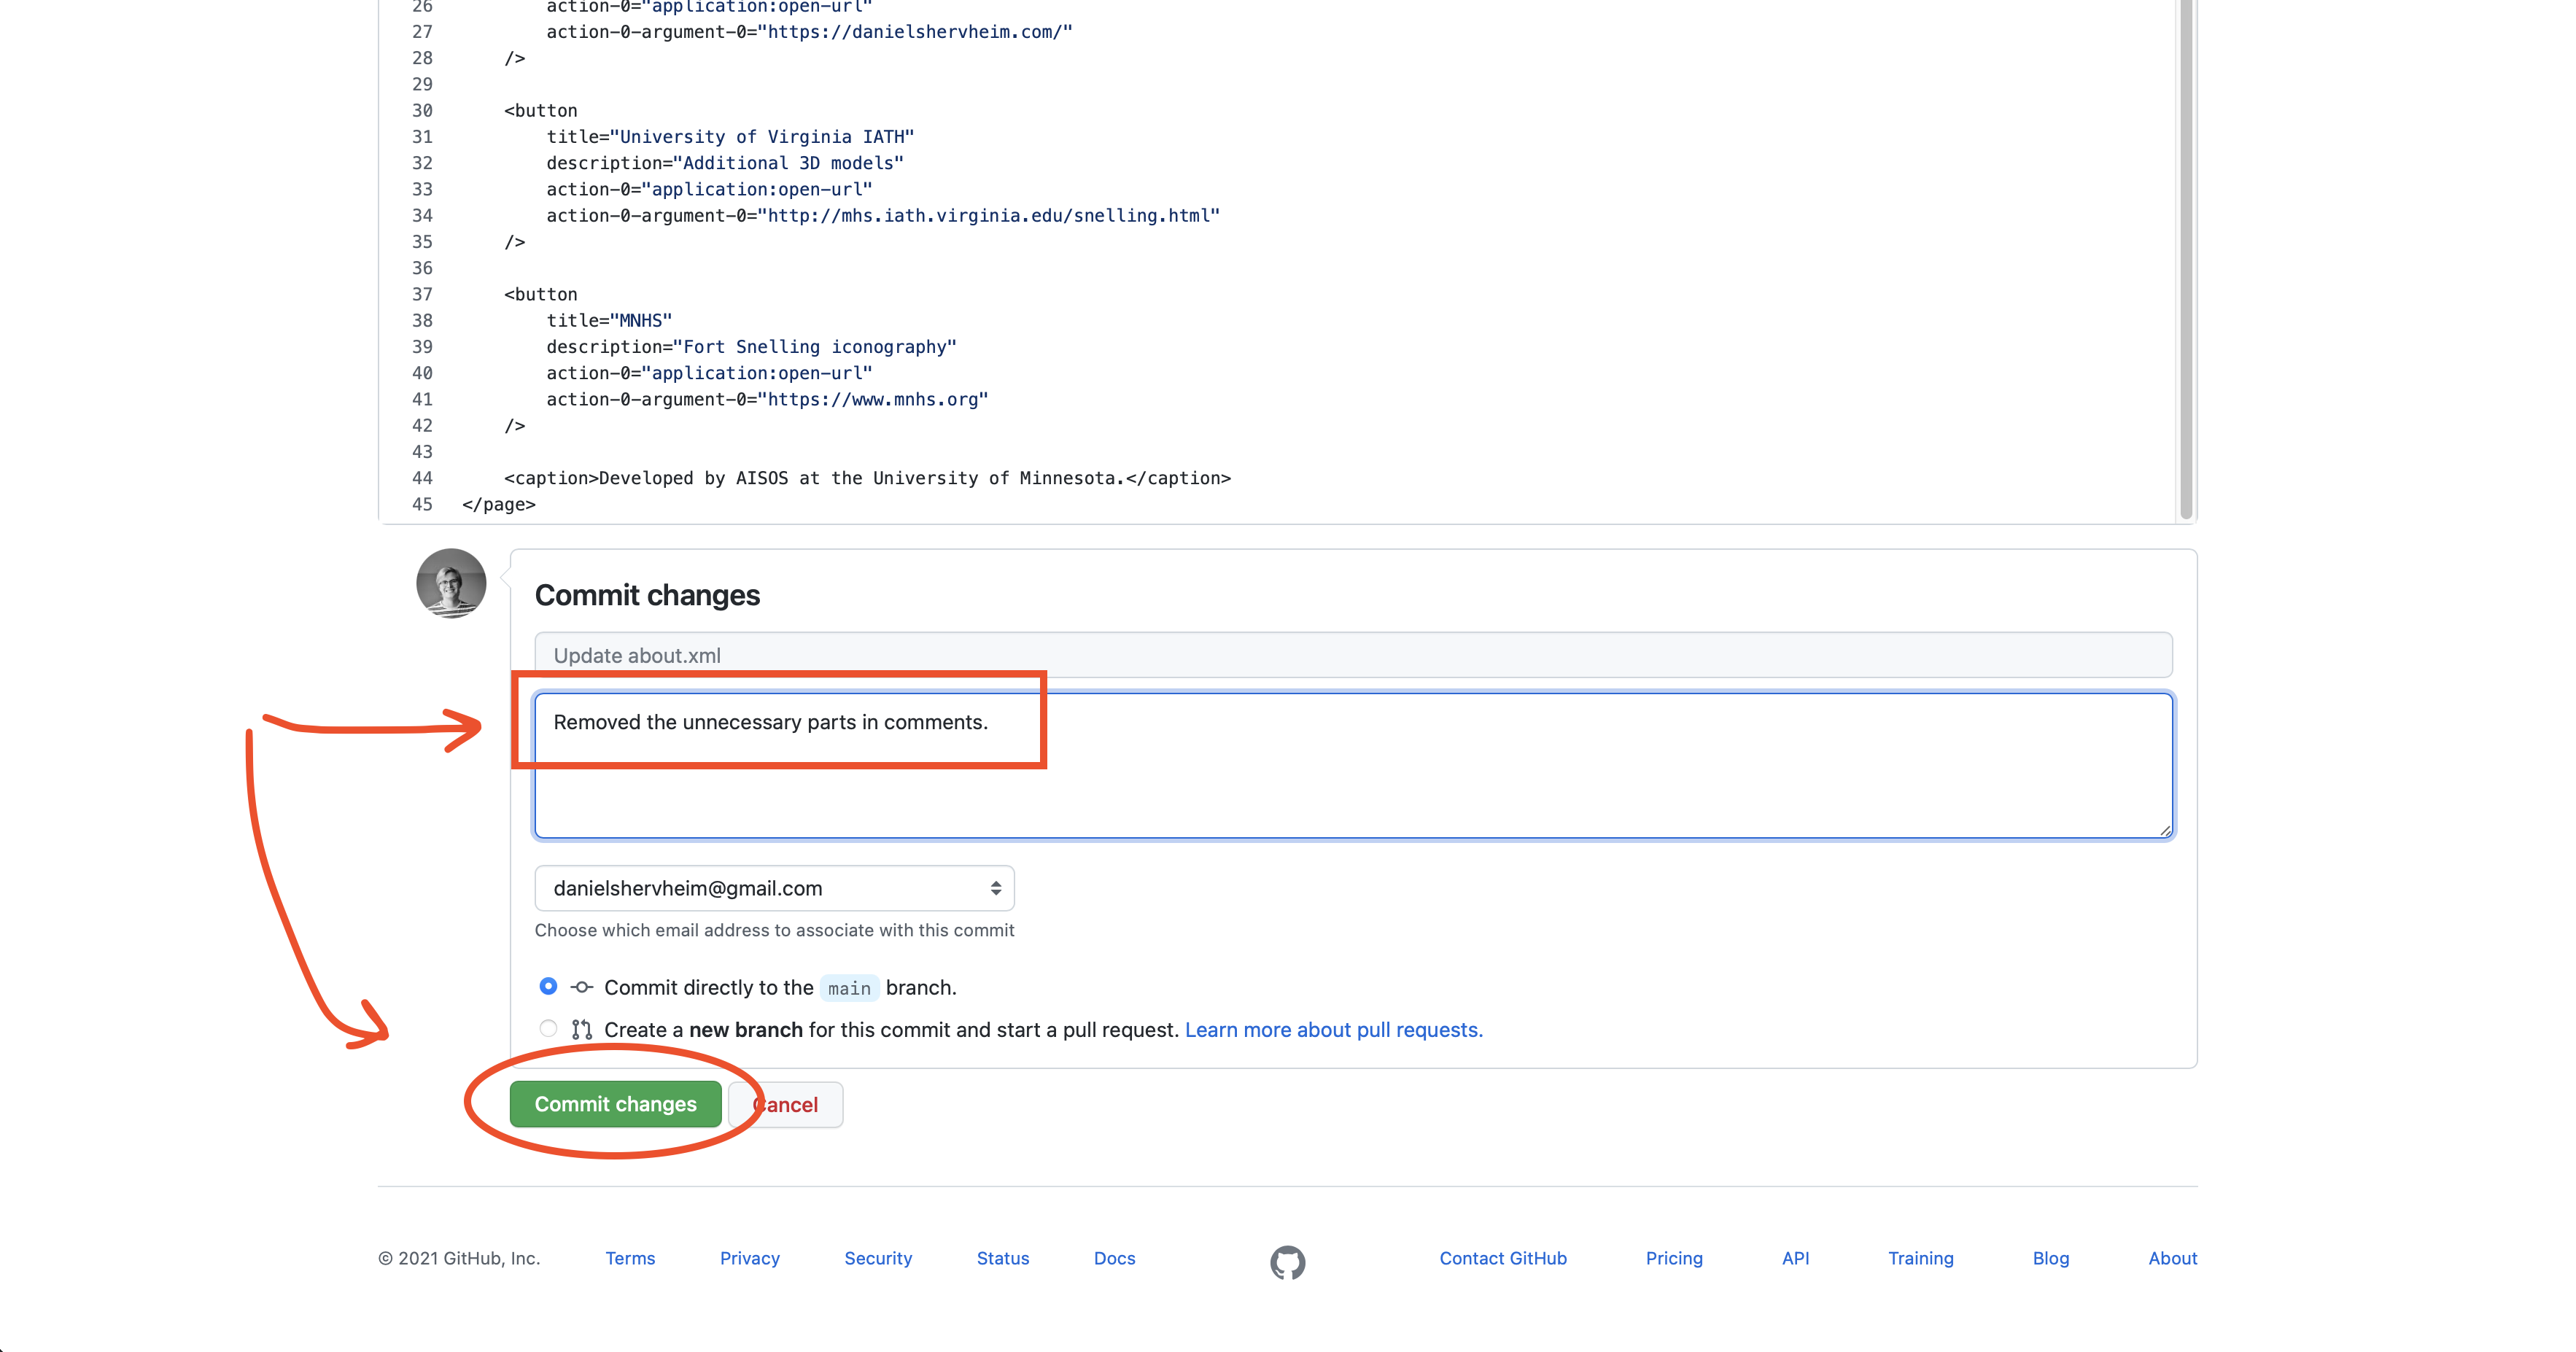
I’ve just removed two comments that weren’t doing anything useful anyway.
Step 3. Comment and commit
Add a note outlining what you changed, and press the “Commit” button.
Once you’ve commited your changes, your fork should update itself and you are ready to test it. Note that Github takes a few minutes to update the site after you make changes, so give it a few minutes before you test.
2. Load your fork in the app
Once your fork of the data repository has updated itself, you can test it in the app.
- Open the menu
- Open the “Options” page
- Open the “Developer Options” page
- Scroll down to the “Developer server url” input
- Type in the full url of your fork of the data repository
- Press the submit button
- Wait a few seconds for the content to load
If the content failed to load for some reason, it will show you the “error” screen when you try to open the menu. From there, you can either try again or check the messages page to see the reason for the failure.
3. Verify everything works as intended
Open the new pages you added, and verify that all the text, buttons, images, etc work as you intend them to.
Additionally, check the log page for any errors or warnings that might have popped up while reading your content. This page can be accessed from the main menu in Options > Developer Options > Log.
At this point, you’re changes only exist on your own fork of the data repository, so they can’t be seen by everyone else who uses the app. The next section details how to contribute your changes to the original repository, and thus make them available to all users.